May, 2016
Installing s2Member
Table of Contents
This Knowledge Base Article covers installing both the free s2Member Framework and the s2Member Pro Add-on. The s2Member Framework is the free plugin available from the WordPress.org Plugin Repository. s2Member Pro is an add-on to the s2Member Framework which adds features to the base plugin. You must have the s2Member Framework installed to use s2Member Pro.
This article is part of the s2Member User's Guide, a series of articles that cover the fundamentals of using s2Member.
Installing the s2Member Framework
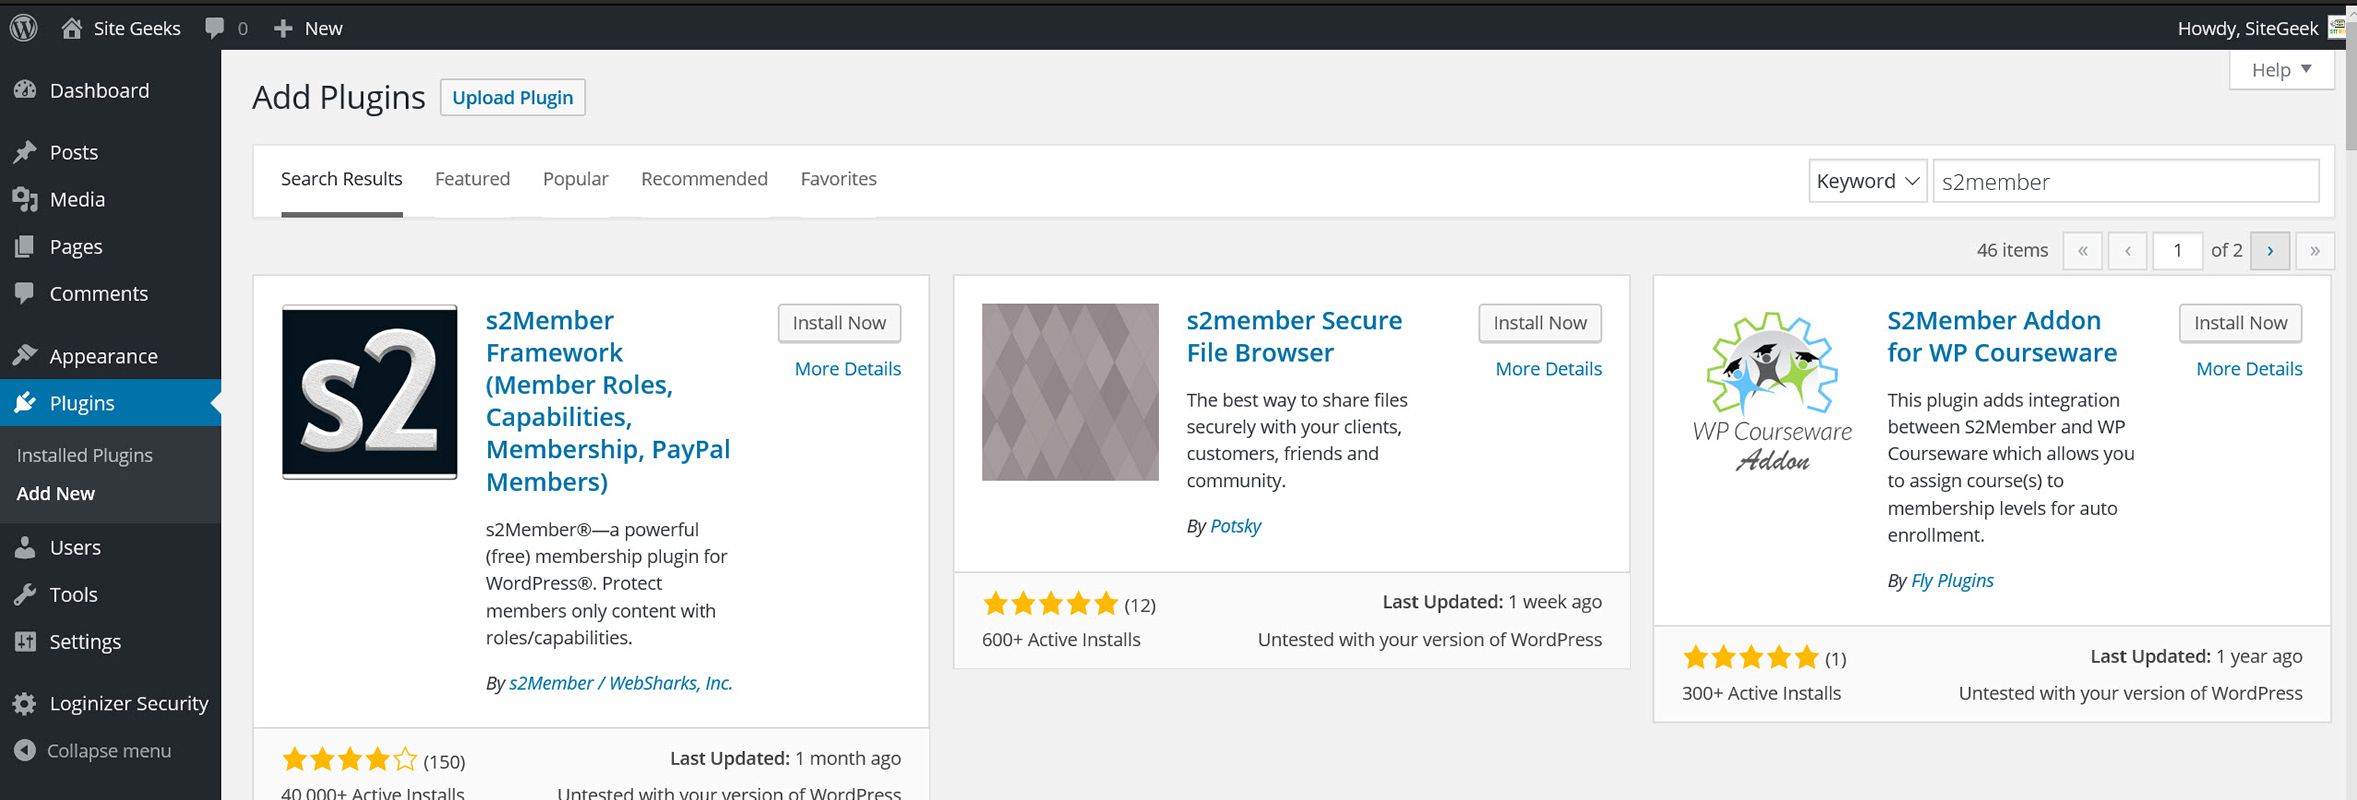
The s2Member Framework can be installed straight from WordPress.org. From WordPress Dashboard → Plugins → Add New, type s2Member into the Search box and press Enter. The s2Member Framework should be the first plugin displayed in the grid. Click Install Now.
The plugin will install. Once you see Successfully installed the plugin s2Member Framework..., click Activate Plugin. That's usually all there is to installing the s2Member Framework.
If you have any problems installing the Framework through the WordPress plugin directory, you can install the Framework using FTP instead.
Alternative Installation Method: Using FTP
- Download the s2Member Framework zip file from your account at s2member.com.
- Extract the files from the zip file. Inside the top-level folder you've extracted, you'll find the
s2memberfolder. - Log in to your web server using FTP.
- Navigate to the plugins folder for your installation of WordPress. This is
/wp-content/plugins/by default. - Upload the
s2memberfolder to your plugins folder. - After the files have uploaded you should see the following new folders in your plugins folder:
s2members2member-filess2member-logs
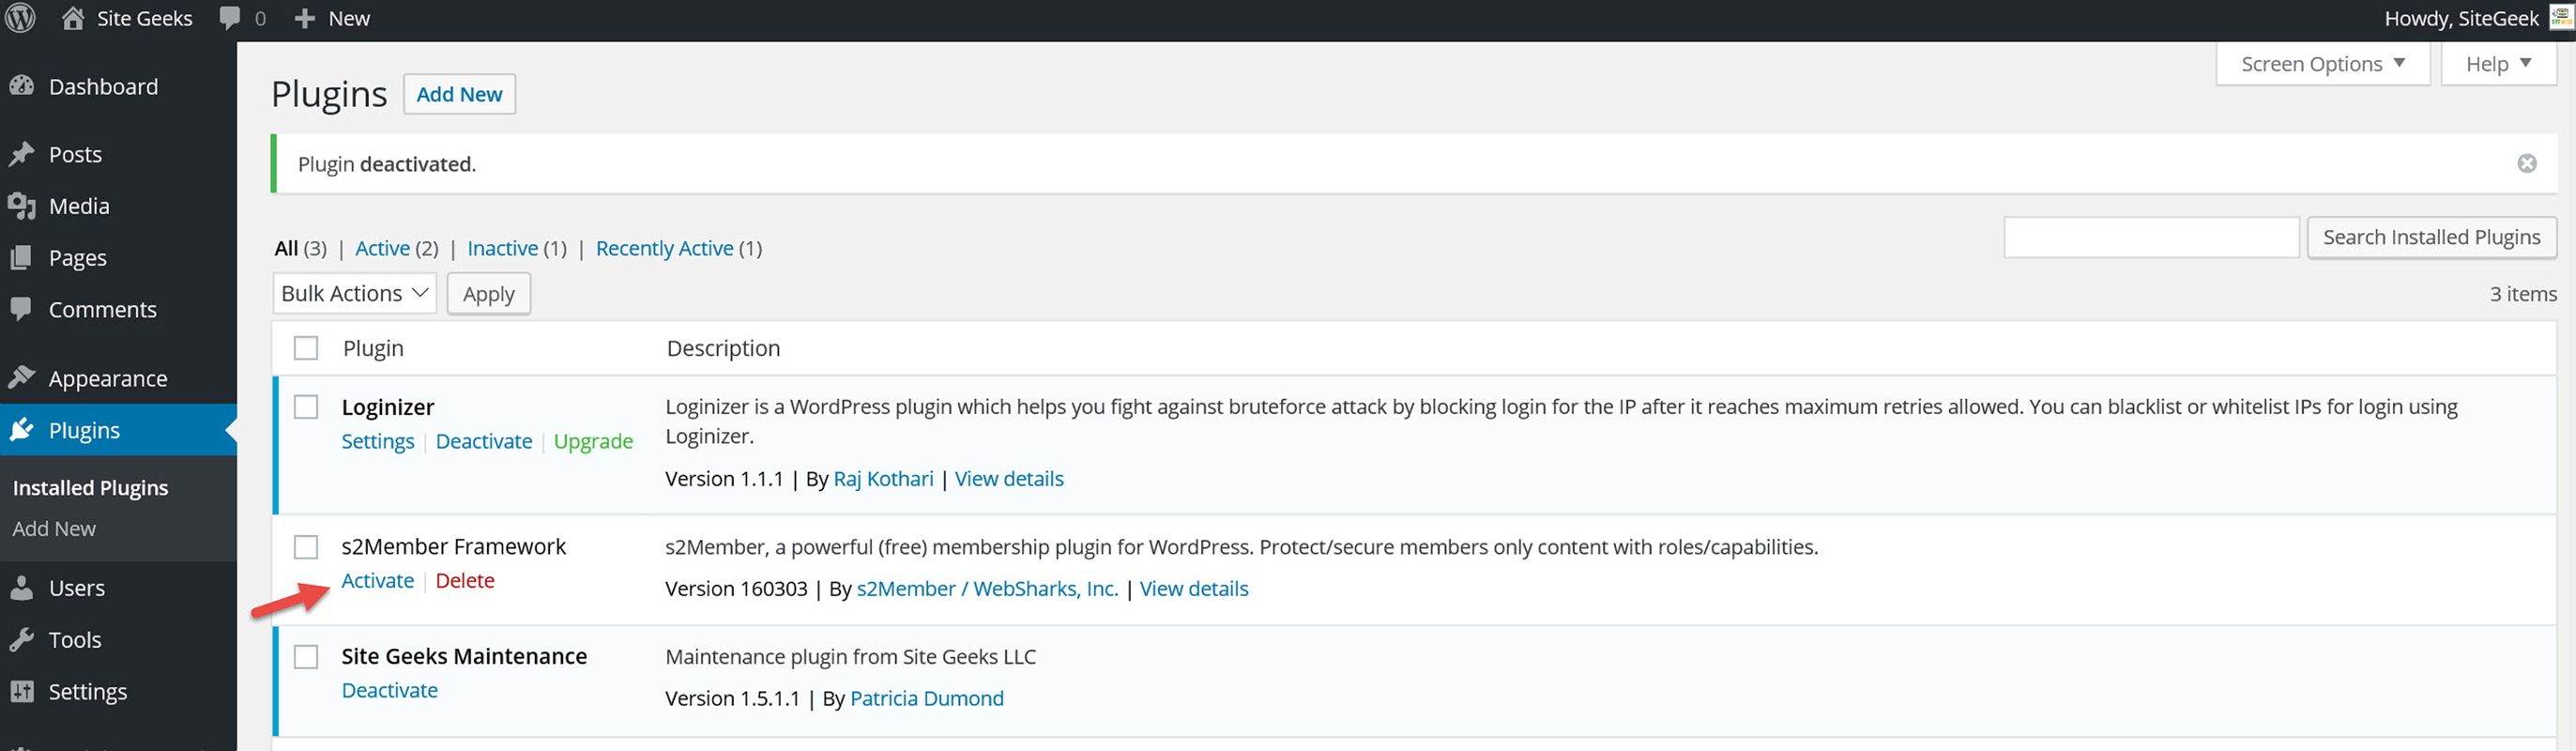
Go into your WordPress Dashboard: WordPress Dashboard → Plugins. You should see s2Member Framework listed as an inactive plugin. Click Activate.
Installing the s2Member Pro Add-on
If you've already configured the s2Member Framework, you might be concerned about losing your settings when you install the s2Member Pro Add-on. There's no reason to be concerned, but s2Member features a setting to prevent losing your configuration when deactivating the plugin.
Go to WordPress Dashboard → s2Member → General Options → Plugin Deletion Safeguards. Make sure this is set to the default of Yes(safeguard all data/options). Then click the Save All Changes button at the bottom of the page.
Tip: It is a good idea to always leave this set to Yes unless you are absolutely sure you will no longer be using s2Member on a website.
Note: You must install the s2Member Framework before installing the s2Member Pro Add-on.
- Download the s2Member Pro Add-on zip file from your account at s2member.com.
- Extract the files from the zip file. Inside the top-level folder you've extracted, you'll find the
s2member-profolder. - Log in to your web server using FTP. (You can use an application like FileZilla.)
- Navigate to the plugins folder for your installation of WordPress. This is
/wp-content/plugins/by default. - Upload the
s2member-profolder to your plugins folder. - After the files have uploaded you should see the following new folders in your plugins folder:
s2members2member-filess2member-logss2member-pro
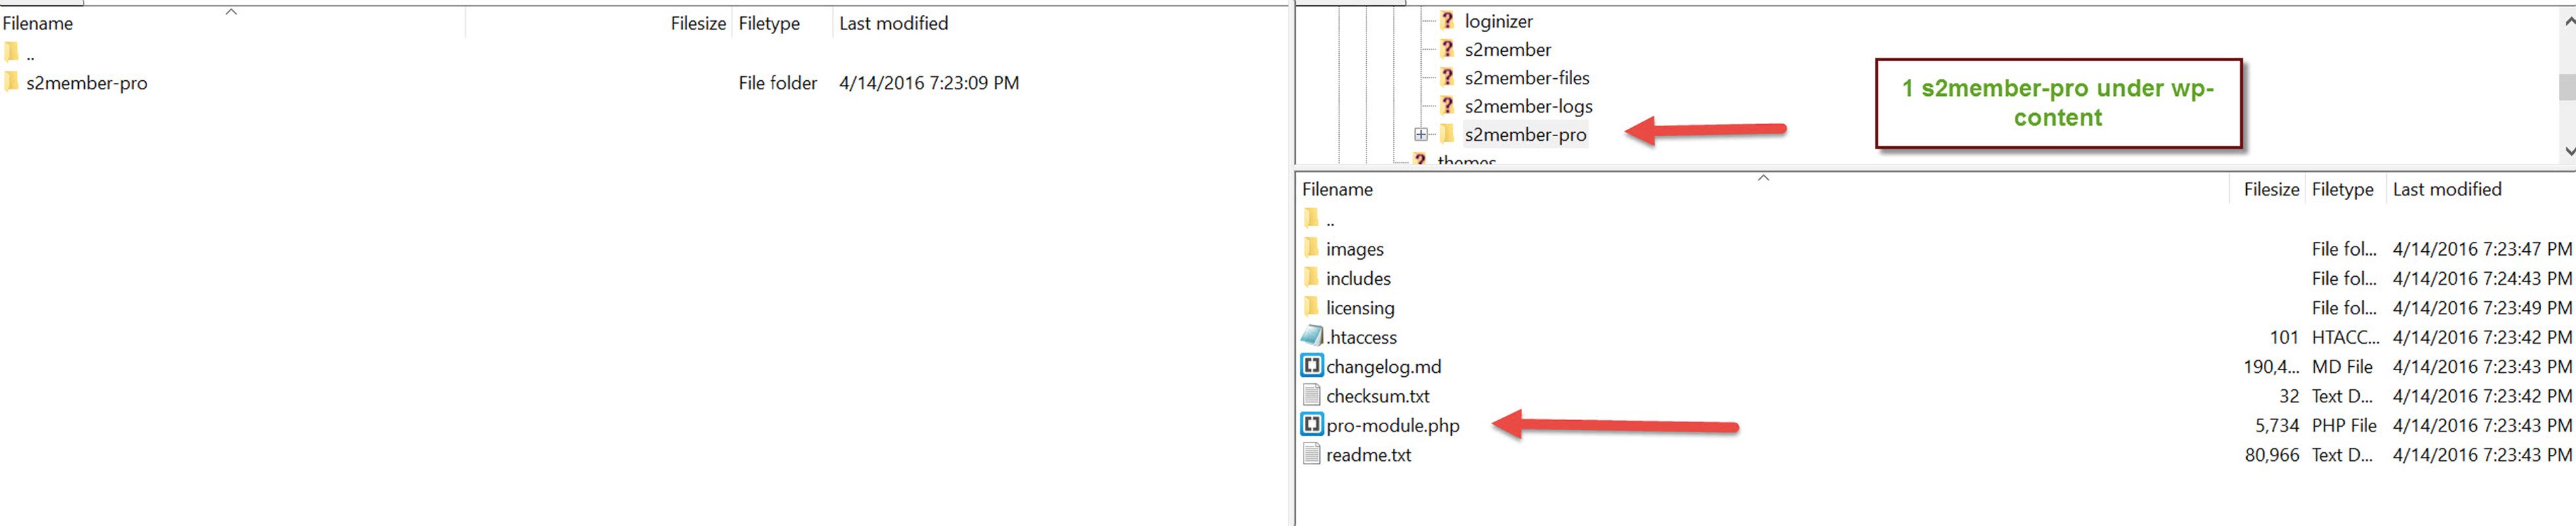
To verify that you completed this step properly, please make sure that you have the following file path:
/wp-content/plugins/s2member-pro/pro-module.php
If instead, you have double /s2member-pro/s2member-pro/ directories nested inside each other, please correct this before you continue. In other words, if you unzipped the folder inside itself, this will cause problems. You should have: /wp-content/plugins/s2member-pro/pro-module.php, along with several other files and subdirectories.
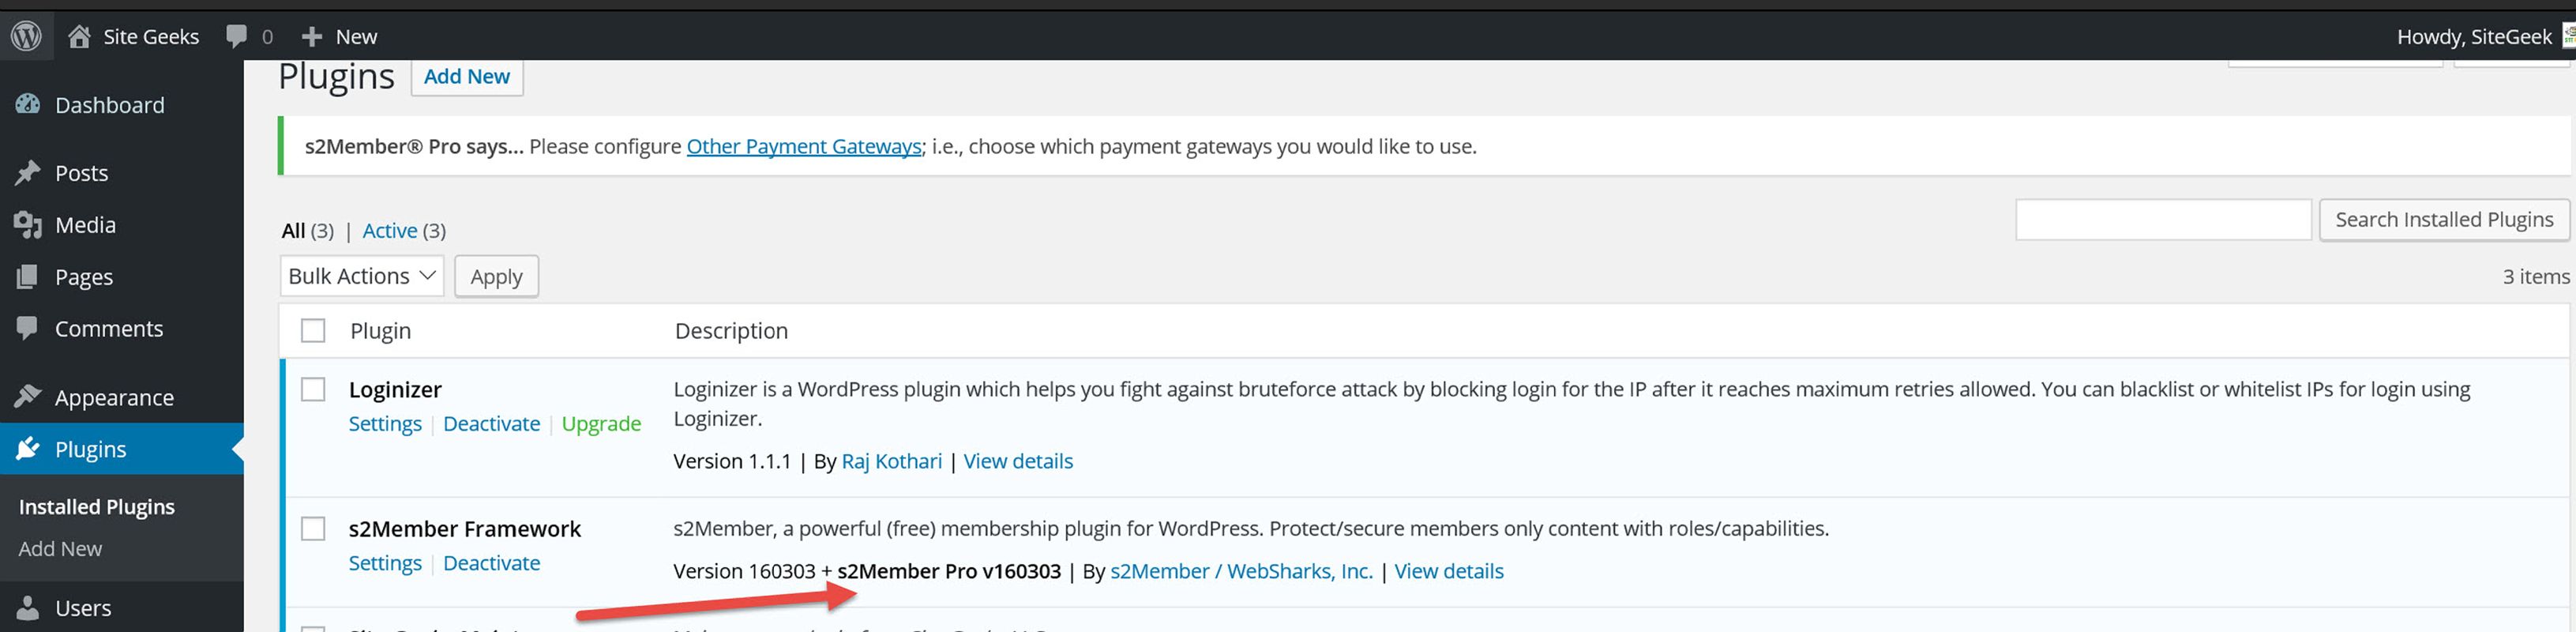
Go into your WordPress Dashboard, WordPress Dashboard → Plugins. You should see something like s2Member Pro 160303 listed next to the version number in the plugin listing for the s2Member Framework.