Jun, 2016
Configuring s2Member Support for Stripe
Table of Contents
This Knowledge Base Article covers setting up s2Member to work with Stripe. Stripe absolutely rocks! It is a developer-friendly way to accept payments online and in mobile apps. They process billions of dollars a year for thousands of companies of all sizes. It is easy to integrate and easy for customers to use.
Stripe charges no monthly fees. Their per-transaction fees are in line with PayPal and (after your first transaction, which can take up to fourteen days to process), Stripe transfers received funds to your bank account within three business days.
s2Member Pro has been integrated with Stripe for Direct Payments and also for Subscriptions (Automated Recurring Billing). To take advantage of this integration, you will need to have a Stripe Merchant Account (it is free). Once you have an account, all of the details below can be obtained from your Stripe account. If you need assistance, please check their help section.
This article is part of the s2Member User's Guide, a series of articles that cover the fundamentals of using s2Member.
Stripe Account Details
See WordPress Dashboard → s2Member (Pro) → Stripe Options → Account Details This section is required (if you are using Stripe).
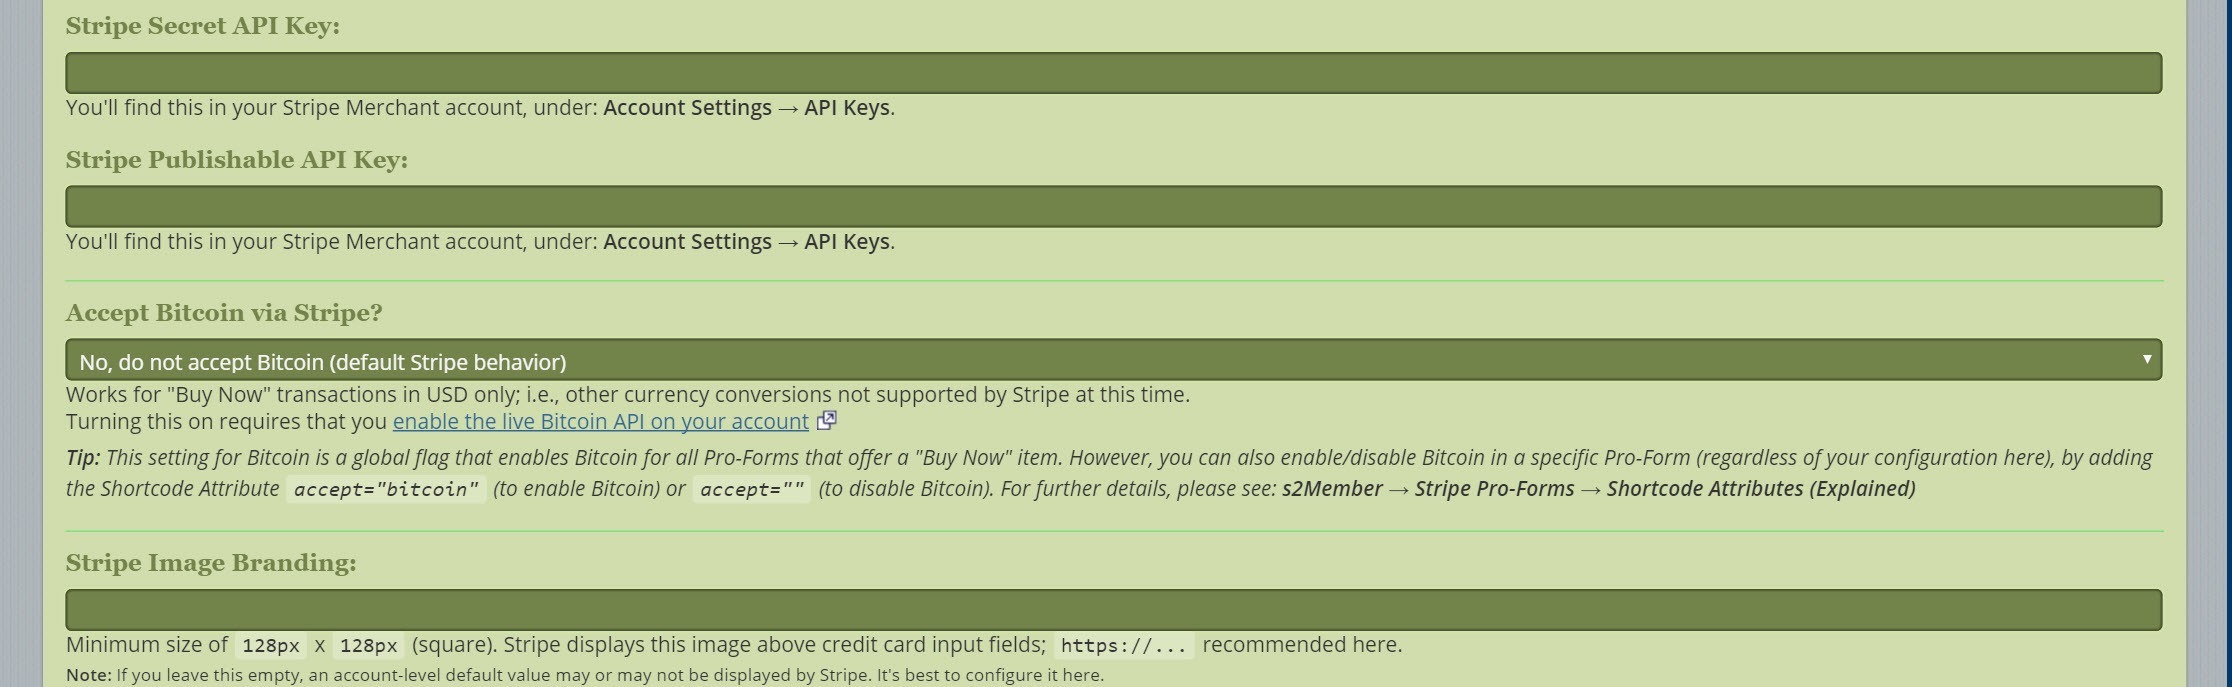
- Stripe Secret API Key: You'll find this in your Stripe Merchant Account under Account Settings → API Keys.
Stripe Publishable API Key: You'll find this in your Stripe Merchant Account under Account Settings → API Keys.
Stripe Statement Description: This is an arbitrary string (15 characters max) to be displayed alongside your company name. The Stripe Statement Description appears on your Customer’s credit card statement. The Stripe Statement Description may not include these special characters:
<,>,",'. Note: If you leave this empty, Stripe uses an account-level default value (configured in Stripe) instead.
Stripe Webhook/IPN Integration
See WordPress Dashboard → s2Member (Pro) → Stripe Options → Stripe Webhook/IPN Integration.
This section is required (if you are using Stripe).
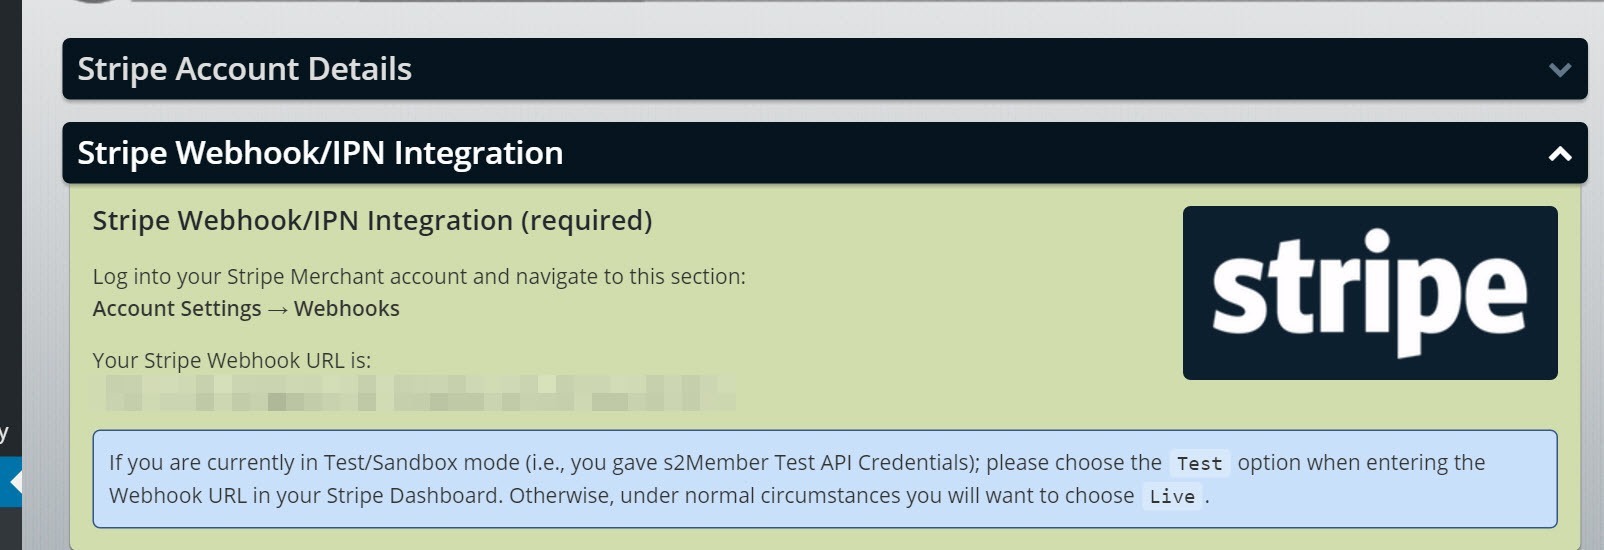
Log into your Stripe Merchant Account and navigate to Account Settings → Webhooks. Click on the Add Endpoint button.
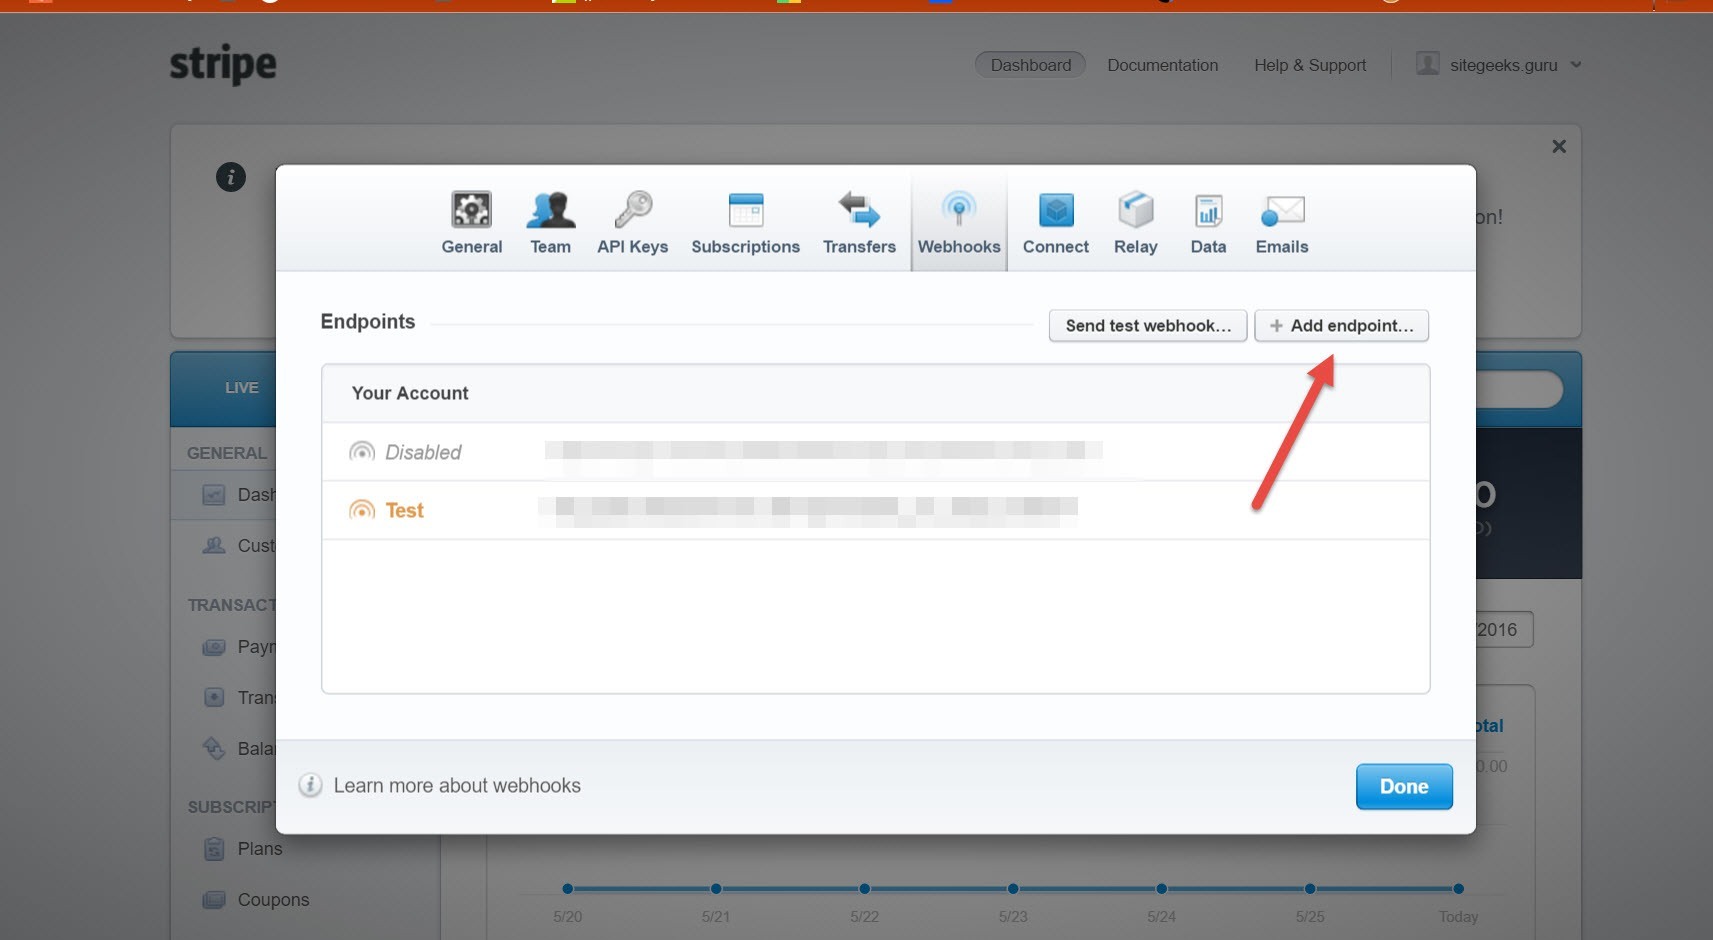
Copy the Stripe Webhook URL shown on the s2Member Stripe Webhook/IPN Integration panel to the URL field on the pop-up window at Stripe. Click the Create Endpoint button and then click the Done button on the Endpoints window.
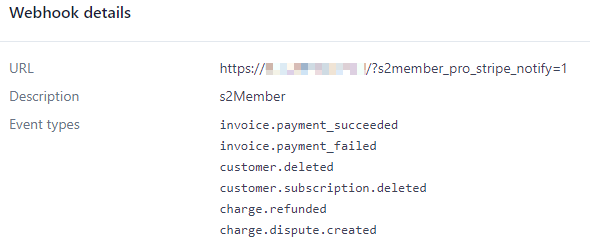
invoice.payment_succeeded
invoice.payment_failed
customer.deleted
customer.subscription.deleted
charge.refunded
charge.dispute.created
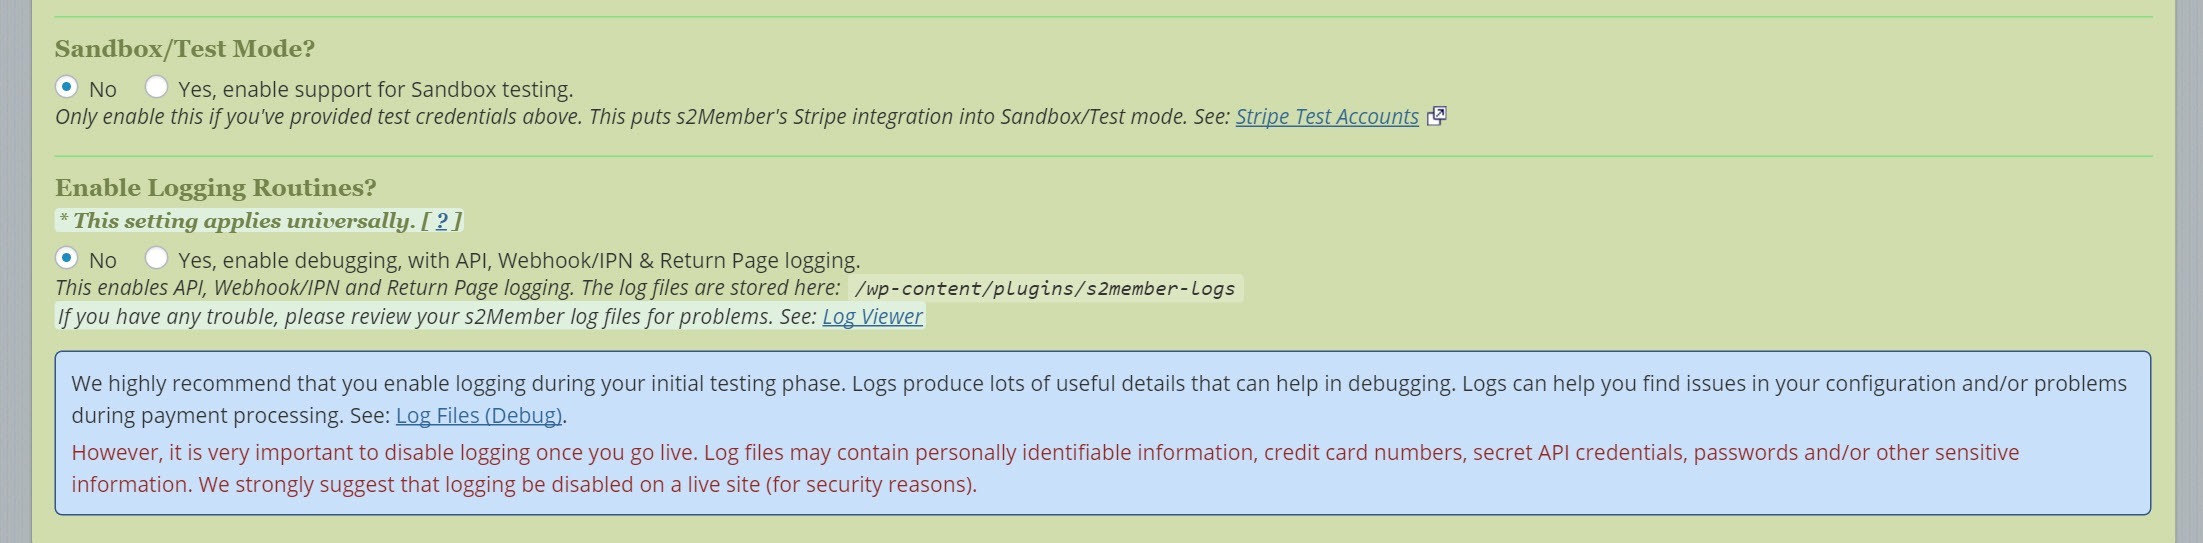
Note: If your site is currently in Test/Sandbox mode and you entered Test API Credentials in the Stripe Account Details panel, please choose the Test option when creating your Webhook endpoint at Stripe (described above). Otherwise, choose Live.