Mar, 2016
Integrating ClickBank with s2Member
Table of Contents
ClickBank is a secure online retail outlet for more than 10,000 digital product vendors and 100,000 active affiliate marketers. ClickBank is one of the largest online retailers and has over 200 million customers worldwide. They serve more than 200 countries, and are consistently ranked as one of the most highly-visited sites on the web.
If you are planning to use ClickBank as your preferred payment gateway with s2Member, you can easily integrate it with s2Member for Direct Payments (Buy Now) and Recurring Billing.
Note: ClickBank integration is only available with s2Member Pro.
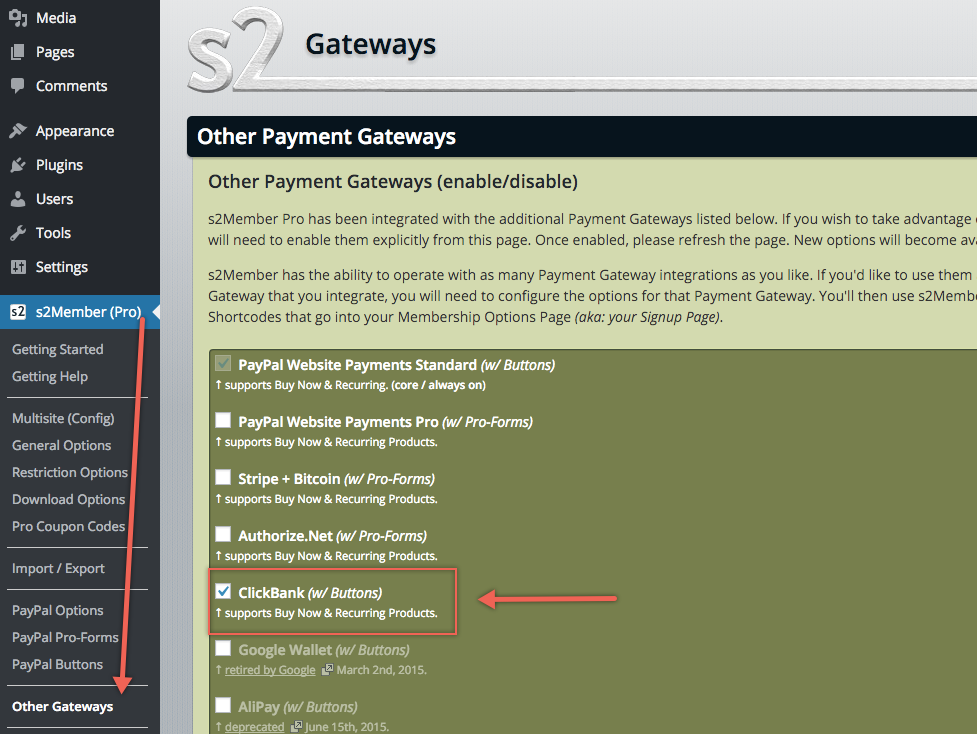
Step 1: Enable ClickBank Gateway Inside s2Member
1) Inside s2Member, activate the ClickBank Gateway from the Other Gateways option. See: WordPress Dashboard → s2Member® → Other Gateways. This is not enabled by default and you will only see the Other Gateways option if you are using s2Member Pro.
2) Scroll down to the bottom until you find the ClickBank (w/ Buttons) and check the box for it. Save changes and refresh the page.
Step 2: Configure ClickBank Account Details (required)
1) Sign up for a ClickBank Merchant Account here: https://accounts.clickbank.com/public/#/signup/form/key/ (if you don't have an existing account yet)

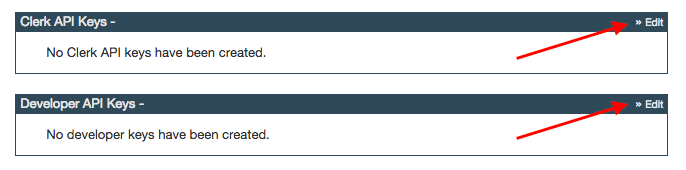
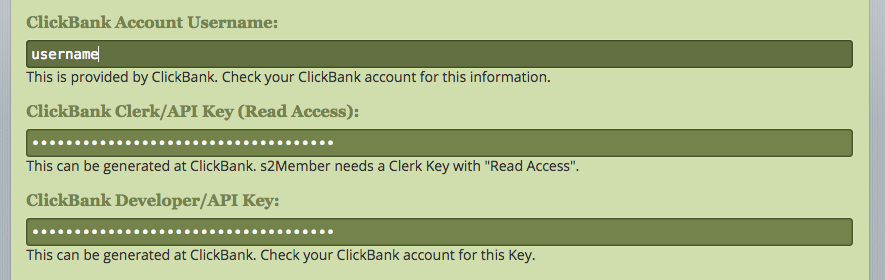
2) Inside your ClickBank account, go to Settings → My Account. Scroll down until you see the sections for configuring the Clerk API key and Developer API Key.
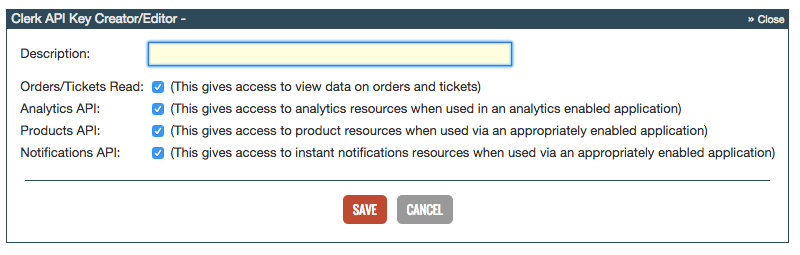
- To generate the Clerk/API Key, click the Edit button on the top right corner of that box. Click the Create New Clerk User API Key button.

- In the area that appears, fill in a description (e.g., "s2Member Integration") and tick all boxes to each option. Click the Save button.
- To generate the Developer/API Key, click the Edit button on the top right corner of that box. Click the Create New Developer Key button.

- In the area that appears, fill in a description (e.g., "s2Member Integration") and click the Save button.
3) Inside s2Member, go to WordPress Dashboard → s2Member → ClickBank Options → ClickBank Account Details, enter your ClickBank username and generated API keys for both Clerk and Developer. Save changes.
Step 3: Configure ClickBank IPN v2.1 or v6 Integration (required)
To configure the ClickBank IPN v2.1 or v6 integration, it must be set up inside your ClickBank account and s2Member.
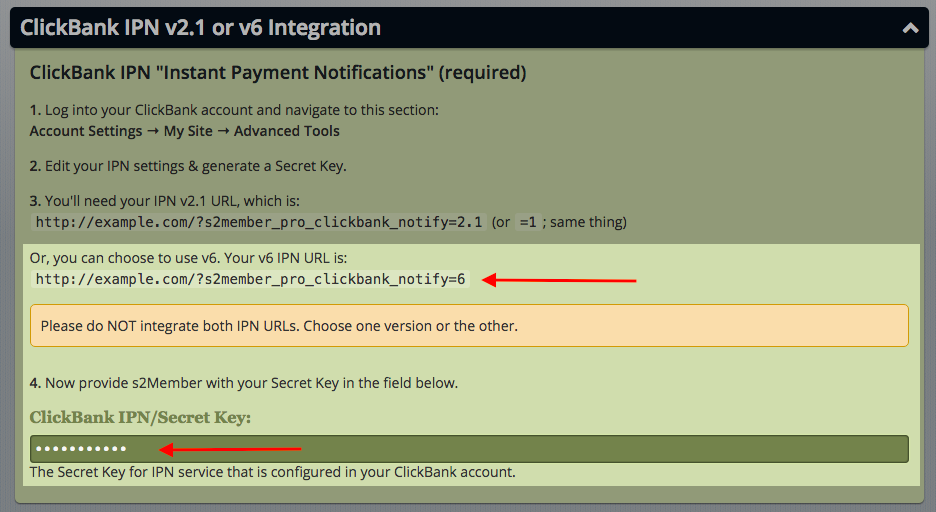
1) First, inside your ClickBank account, create a secret key and enter it on the ClickBank IPN/Secret Key field found here: WordPress Dashboard → s2Member → ClickBank Options → ClickBank IPN v2.1 or v6 Integration.
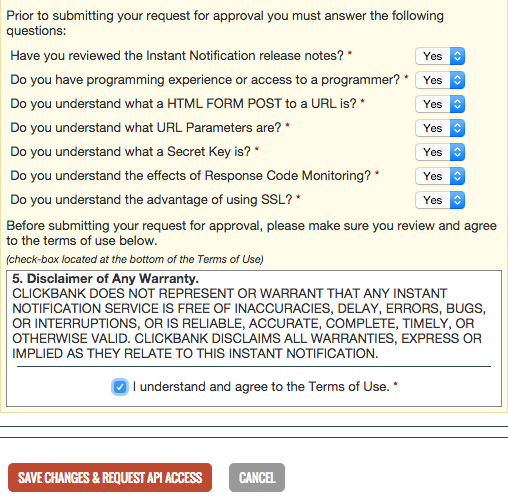
- To create a secret key inside your ClickBank account, navigate your way to the top right of the page and go to Settings → My Site. Scroll down to the bottom until you see the section that says Advanced Tools. Click the Edit button on the top right corner of that box. Type in a secret key of your choice. (Note: The secret key must be no more than 16 characters and/or digits, and it must be in ALL CAPS.)

- Click Request Access next to Instant Notification URL.

- In the area that appears, select Yes to each questions. Scroll to the bottom of the Terms of Use area, tick the box and click on the Save Changes & Request API Access button.
2) Once that has been done, go back to your s2Member account and copy the Instant Payment Notification URL. See: WordPress Dashboard → s2Member → ClickBank Options → ClickBank IPN v2.1 or v6 Integration. You can choose to either use IPN v2.1 URL or IPN v6 URL (You'll choose the version when you configure the URL inside your ClickBank account; we recommend using v6 unless ClickBank says to use v2.1).
Note: Please do NOT integrate both IPN URLs. Choose one version or the other.
3) After copying the Instant Payment Notification (IPN) URL, go back to your ClickBank account. Navigate your way to the top right of the page and go to Settings → My Site. Scroll down to the bottom until you see the section that says Advanced Tools. Click the Edit button on the top right corner of that box.

4) Paste in the IPN URL on the Instant Notification URL field and click the Test Pin button to verify it.
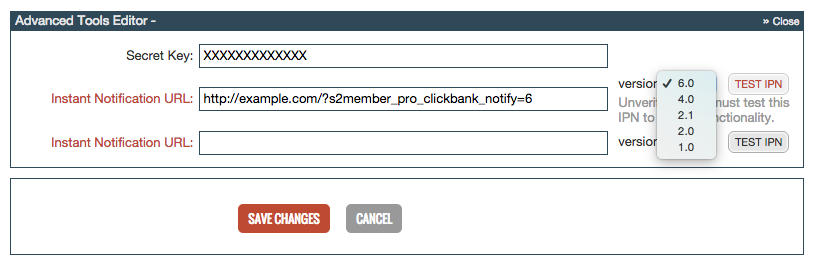
5) After verifying, click on the Save Changes button. That's it! Your ClickBank integration is now complete.
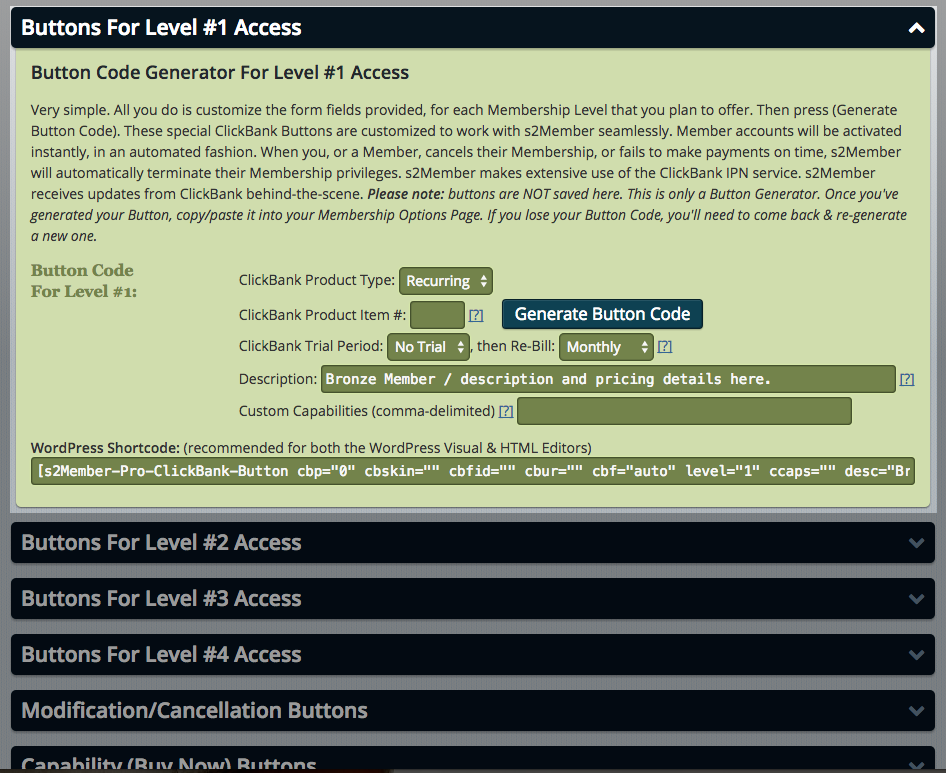
Using s2Member-generated ClickBank Buttons
With the ClickBank integration complete, you can now generate ClickBank buttons to provide paid access to the site. See: WordPress Dashboard → s2Member → ClickBank Buttons