Apr, 2015
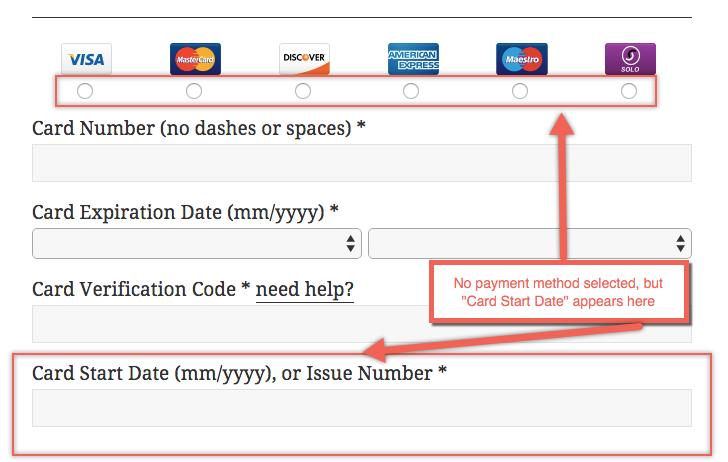
Why does “Card Start Date or Issue Number” always show on my Pro-Form?
If you see the "Card Start Date or Issue Number" field on your Pro-Form even when no Billing Method has been selected, then you likely have two (2) Pro-Forms on the same page. This will cause problems—you can only have one Pro-Form shortcode on a page at a given time.
Using Separate Pages for Billing Update, Billing Cancellation, and Billing Modification
If you're going to offer your members a way to update their billing information (Billing Update Form), modify/upgrade/downgrade their membership (Billing Modification Forms), or allow them to cancel their membership (Billing Cancellation Forms), we recommend creating three separate WordPress Pages for each one of those and placing the appropriate Pro-Form shortcode on each page.
Once you have three pages setup with the appropriate forms, you can add links to the Login Welcome Page (i.e., the "My Account" page) that will allow the member to visit each of the pages you created (e.g., "If you'd like to cancel your membership, click here.").
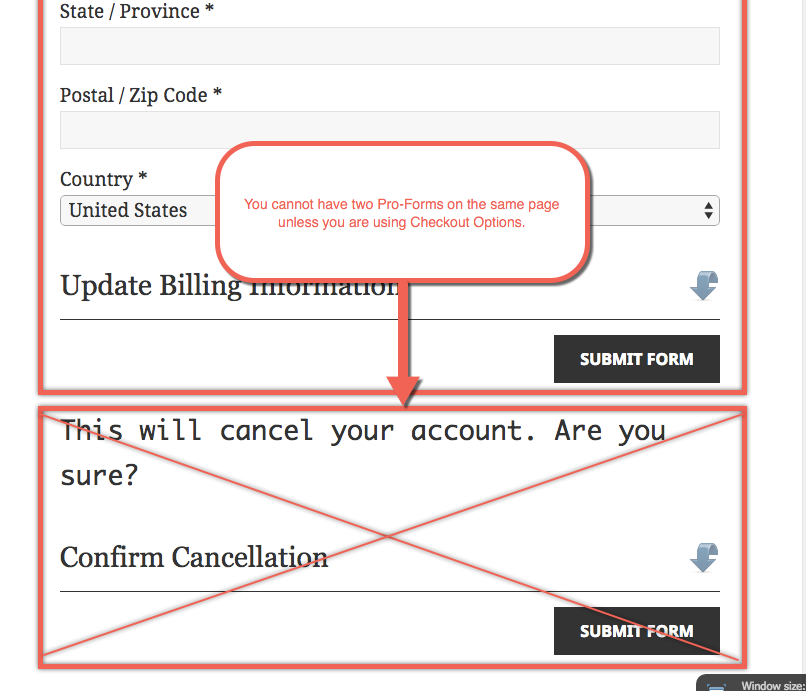
You must place each of these Pro-Forms on separate pages, as placing two or more on one page will introduce conflicts.
If you want to place multiple Pro-Forms on a page for the purposes of providing multiple checkout options, please see the next section.
Using Checkout Options to Combine Multiple Pro-Forms on One Page
If you want to offer multiple checkout options by including several Pro-Forms on a single page, you must use Checkout Options.